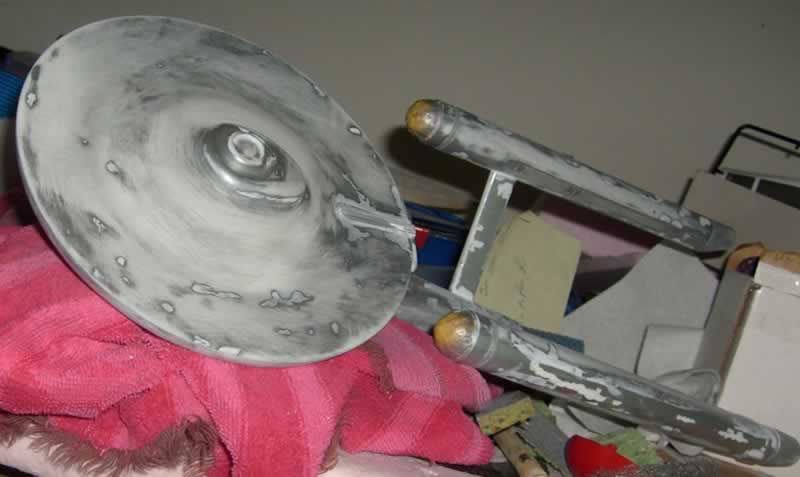
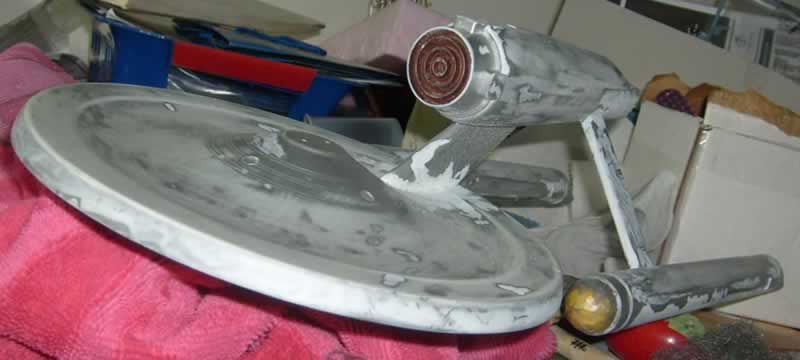
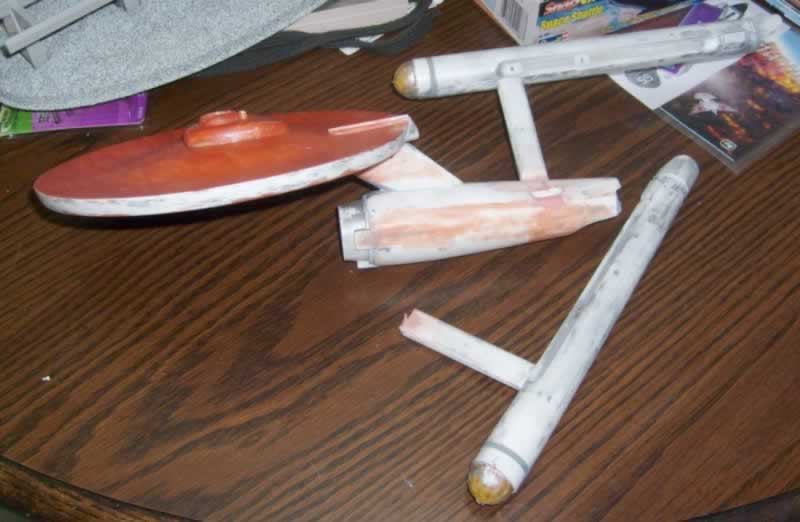
I originally built this model as a kid, so I was really happy to see that Round 2 had rereleased it again. I picked up the limited edition tin box at a scratch and dent sale, there was very little damage to the box, really only on the bottom and I got it a little cheaper than a cardboard box version, plus it comes with a nice poster of the box art.
Here is a good article on the history on the AMT Enterprise, A History of the AMT Enterprise Model by Jay Chladek
http://www.culttvman2.com/dnn/tabid/74/ctl/ArticleView/mid/408/articleId/6/Default.aspx
on the CultTVMan website.
http://www.culttvman2.com/dnn/Home/tabid/36/Default.aspx
I wanted to build this model straight out of the box like I did when I was a kid, just hopefully better! I know there are some accuracy issues, I just wanted this as a fun build and to hopefully be a bit of a step back in time.
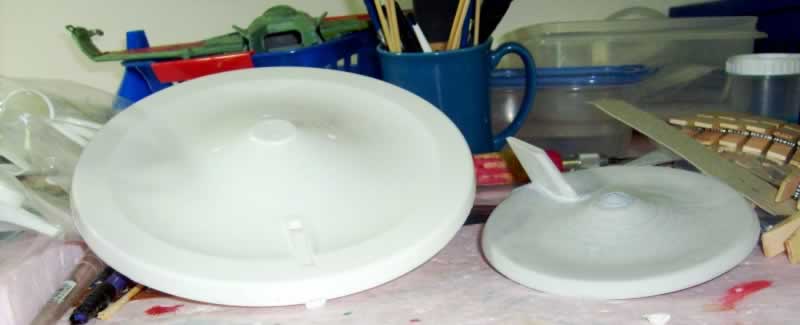
This photo shows the difference in size between the AMT 1/650 saucer and the Polar Lights 1/1000 Enterprise saucer.
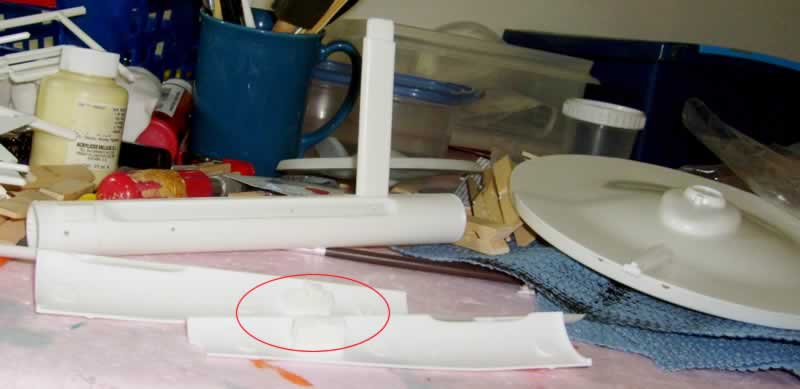
A lot of the builds I have seen of this model have used super glue and they had some real problems with the engineering hull and the pylons, I have a pretty bad allergic reaction to super glue so I mostly use the liquid gel glue. I was going to lay in a lot of glue where the pylons and neck glue into, I didn't want a lot of the plastic goo squeezing out, so I filed down the corners of the tabs that they glue into so there is a little bit of an opening where the plastic goo will hopefully squeeze out of. It's kind of hard to see in the circle on the photo, the top one has been filed down.
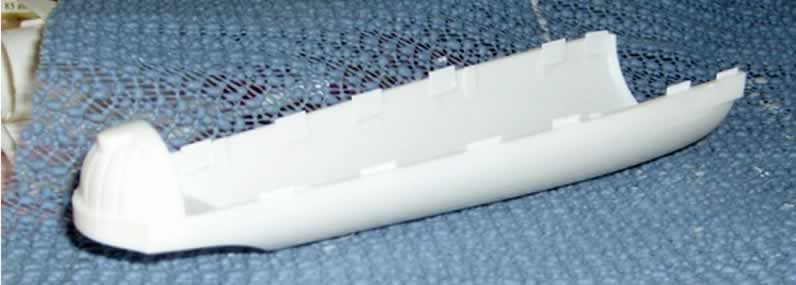
A lot of the guys that used super glue would end up having the engineering hull cracking along the joint line as it's really only a butt joint. To give a little more gluing area and strength, I cut a number of tabs from some plastic sheet and glued them on, they were a big help in assembly. So far, mine has withstood some heavy man handling.

The kit stand is pretty much worthless, I just used a #11 blade and twirled it around and then used a file to finish the opening and put in a plastic rod, I will use some aluminum tubing with a homemade stand for better support.

I didn't have any gaps anywhere on the engineering hull which surprised me, but I did have some lips which did take some filing and sanding. Some better clamps probably would have eliminated most of that.

The nacelles went together nicely, I wish now I would have glued some tabs in these as well as it would've made it a little easier. I had to remove the locating pins from one of them to get it to line up correctly. After filing and sanding, I brushed on some Krylon primer thinned 50% with water where I had sanded and was pleasantly surprised to find it was pretty smooth, not normal for my models! The detail on the grill's on the inside of the nacelles is really showing the age of the molds, some of it is as deep as the original model, some of it is nonexistent, it's just flat plastic.

I was trying to re-create the look of the domes for the front of the nacelles of the original model, first I painted it with antique gold and then painted on some clear red. Looks a lot better in person than in the photos, silver instead of gold might have worked a little better though.
I am doing the detail painting on all of the parts first so I can tape them off before painting the main body color, might be a little backwards, but easier for me than trying to do it after the entire thing is assembled. I tried some washers and drybrushing on the grills on the nacelles, but I'm just not that good at it yet and with the soft details, it just didn't turn out. For some reason, I keep screwing up the detail painting on the nacelles, I must have redone some of it five or six times now, getting closer though.
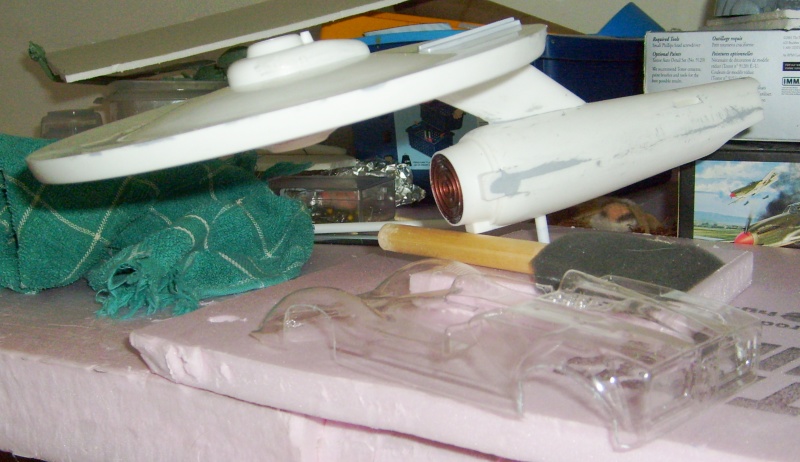
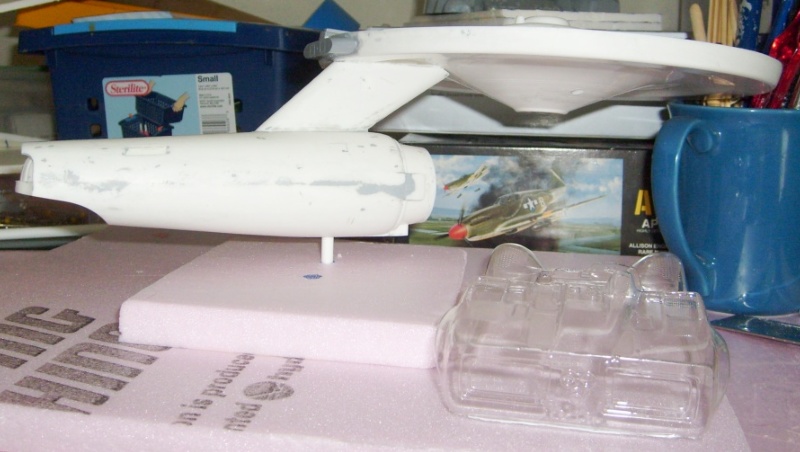
Here is the saucer attached to the engineering hull. I also cut away the pockets from the inside of the saucer and it worked pretty well as I really laid the liquid gel glue in heavy and nothing squeezed out and it is a very solid joint. Only a tiny area at the front and back needed a touch of filler.
Originally I was planning to do this as the Enterprise from the episode Space Seed, scratch building a small ship to go alongside it. This will probably be the only TOS Enterprise I will be building for quite a while as I have so many other models in my stash, also thinking of doing it as the Defiant from the episode Tholian Web where the Defiant is disappearing into an alternate timeline and it is glowing green. I picked up a bottle of very good glow-in-the-dark paint that they say is pretty translucent, the more coats you put on the better glow you get, but it will also give it a green tint just because you can actually see the particles glowing even during the day. When I am painting the base coat on the Enterprise, I will also lay some paint down on a test piece and then try the glow paint over that to see how it works out. I think it would look nice glowing on top of my entertainment center at night, might also drive my cat nuts for a while!
Here is a good article on the history on the AMT Enterprise, A History of the AMT Enterprise Model by Jay Chladek
http://www.culttvman2.com/dnn/tabid/74/ctl/ArticleView/mid/408/articleId/6/Default.aspx
on the CultTVMan website.
http://www.culttvman2.com/dnn/Home/tabid/36/Default.aspx
I wanted to build this model straight out of the box like I did when I was a kid, just hopefully better! I know there are some accuracy issues, I just wanted this as a fun build and to hopefully be a bit of a step back in time.

This photo shows the difference in size between the AMT 1/650 saucer and the Polar Lights 1/1000 Enterprise saucer.

A lot of the builds I have seen of this model have used super glue and they had some real problems with the engineering hull and the pylons, I have a pretty bad allergic reaction to super glue so I mostly use the liquid gel glue. I was going to lay in a lot of glue where the pylons and neck glue into, I didn't want a lot of the plastic goo squeezing out, so I filed down the corners of the tabs that they glue into so there is a little bit of an opening where the plastic goo will hopefully squeeze out of. It's kind of hard to see in the circle on the photo, the top one has been filed down.

A lot of the guys that used super glue would end up having the engineering hull cracking along the joint line as it's really only a butt joint. To give a little more gluing area and strength, I cut a number of tabs from some plastic sheet and glued them on, they were a big help in assembly. So far, mine has withstood some heavy man handling.

The kit stand is pretty much worthless, I just used a #11 blade and twirled it around and then used a file to finish the opening and put in a plastic rod, I will use some aluminum tubing with a homemade stand for better support.

I didn't have any gaps anywhere on the engineering hull which surprised me, but I did have some lips which did take some filing and sanding. Some better clamps probably would have eliminated most of that.

The nacelles went together nicely, I wish now I would have glued some tabs in these as well as it would've made it a little easier. I had to remove the locating pins from one of them to get it to line up correctly. After filing and sanding, I brushed on some Krylon primer thinned 50% with water where I had sanded and was pleasantly surprised to find it was pretty smooth, not normal for my models! The detail on the grill's on the inside of the nacelles is really showing the age of the molds, some of it is as deep as the original model, some of it is nonexistent, it's just flat plastic.

I was trying to re-create the look of the domes for the front of the nacelles of the original model, first I painted it with antique gold and then painted on some clear red. Looks a lot better in person than in the photos, silver instead of gold might have worked a little better though.
I am doing the detail painting on all of the parts first so I can tape them off before painting the main body color, might be a little backwards, but easier for me than trying to do it after the entire thing is assembled. I tried some washers and drybrushing on the grills on the nacelles, but I'm just not that good at it yet and with the soft details, it just didn't turn out. For some reason, I keep screwing up the detail painting on the nacelles, I must have redone some of it five or six times now, getting closer though.


Here is the saucer attached to the engineering hull. I also cut away the pockets from the inside of the saucer and it worked pretty well as I really laid the liquid gel glue in heavy and nothing squeezed out and it is a very solid joint. Only a tiny area at the front and back needed a touch of filler.
Originally I was planning to do this as the Enterprise from the episode Space Seed, scratch building a small ship to go alongside it. This will probably be the only TOS Enterprise I will be building for quite a while as I have so many other models in my stash, also thinking of doing it as the Defiant from the episode Tholian Web where the Defiant is disappearing into an alternate timeline and it is glowing green. I picked up a bottle of very good glow-in-the-dark paint that they say is pretty translucent, the more coats you put on the better glow you get, but it will also give it a green tint just because you can actually see the particles glowing even during the day. When I am painting the base coat on the Enterprise, I will also lay some paint down on a test piece and then try the glow paint over that to see how it works out. I think it would look nice glowing on top of my entertainment center at night, might also drive my cat nuts for a while!


