After a bit of a 4 year break (5 since I last I worked on a cockpit or glue wings together) & not touching a model since my last in 2011, I am finally back in the game again! 

I decided to start with something small and easy... so I chose this Airfix bird dog which belonged to the late George Curmi.

Decided to go for green zinc chromate for contrast, since the darker green used normally on the inside would be too dull on an already dark green overall camo. Also not much effort has been put into the cockpit since it is very small and will be covered up by the main wing.

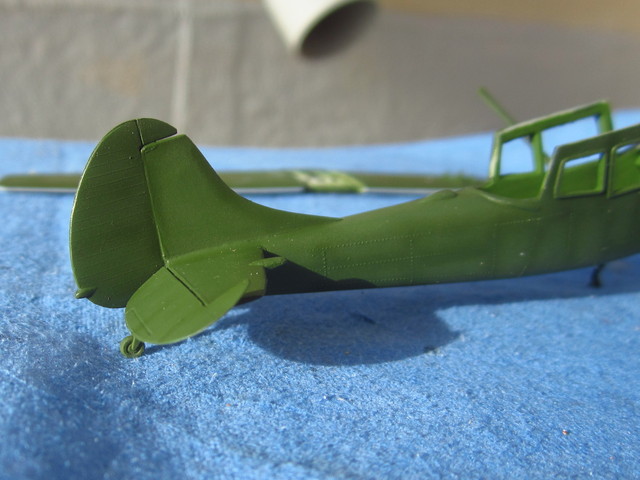
Elevators and rudder cut out and will be pointed downwards/sideways to give it a more realistic and less stiff look.

Lots of filling and sanding on the wings! and a lot of ejector pin marks!

Elevators and rudder super-glued in "a natural" position. Broken back wheel glued on, broken off, and re glued again


Struts glued into fuselage and wheel struts glued on too. Top wing dry fitted.

Looking more like a plane finally!


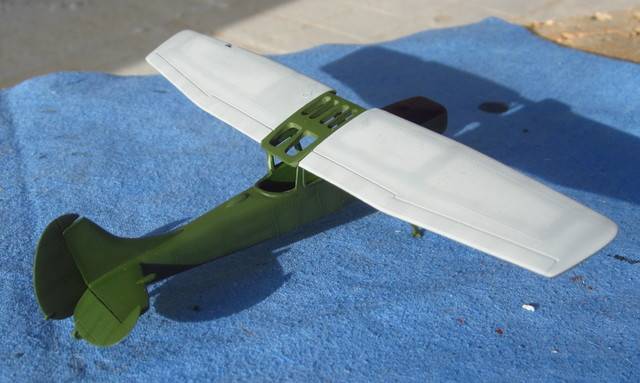
A fine line of masking tape round the entire wing in preperation for the grey top part of the wing.
Used a mix of light ghost gray and white & post shading.

The anti glare patch and top part of wing masked and sprayed.

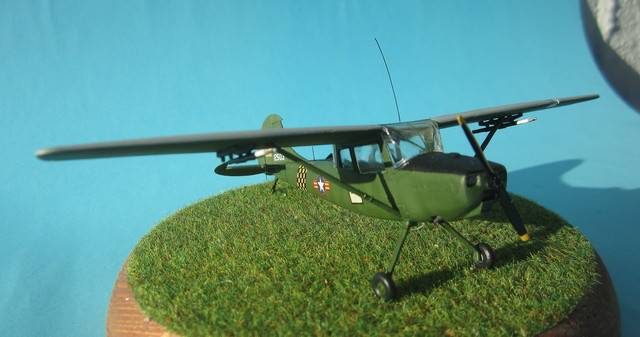
Results:


Post shading was achieved by first spray on the base colour of model master olive green, then adding some white and shading inside the panels. i then went over the panel lines again with the base colour.
Pretty happy with the results. maybe its over done? It was very tricky to spray because of the tiny panels and tiny gaps betwen each panel. also very hard to hold the airbrush straight!!


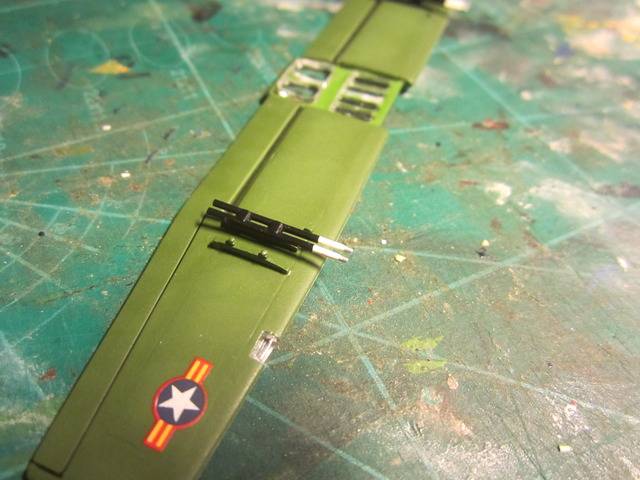
After a "few" coatings of Klear, the model was decalled


Panel washing was done by using water colours.


Base was bought at a home DIY store and covered with some fake turf.


I decided to start with something small and easy... so I chose this Airfix bird dog which belonged to the late George Curmi.

Decided to go for green zinc chromate for contrast, since the darker green used normally on the inside would be too dull on an already dark green overall camo. Also not much effort has been put into the cockpit since it is very small and will be covered up by the main wing.

Elevators and rudder cut out and will be pointed downwards/sideways to give it a more realistic and less stiff look.

Lots of filling and sanding on the wings! and a lot of ejector pin marks!

Elevators and rudder super-glued in "a natural" position. Broken back wheel glued on, broken off, and re glued again


Struts glued into fuselage and wheel struts glued on too. Top wing dry fitted.

Looking more like a plane finally!


A fine line of masking tape round the entire wing in preperation for the grey top part of the wing.
Used a mix of light ghost gray and white & post shading.

The anti glare patch and top part of wing masked and sprayed.

Results:


Post shading was achieved by first spray on the base colour of model master olive green, then adding some white and shading inside the panels. i then went over the panel lines again with the base colour.
Pretty happy with the results. maybe its over done? It was very tricky to spray because of the tiny panels and tiny gaps betwen each panel. also very hard to hold the airbrush straight!!


After a "few" coatings of Klear, the model was decalled


Panel washing was done by using water colours.


Base was bought at a home DIY store and covered with some fake turf.


Last edited by AdriaN on Thu Oct 15, 2015 10:19 pm; edited 1 time in total


