+28
Rob Wood
Samwel18
el manolo
5Nige
Robert
jojjemannen
tiking
Noel Petroni
olivermifsud
Iain
alexbb
smallia
Proximo41
Haratio Fales
RayCaruana
Cyril.
Wayne
Tancred
Dottore
ascomt
skyhigh
in nannu pec
Aldo
iCocker
Ray
David
bcauchi
Paul Salomone
32 posters
1:72 Scale German WW2 Heavy Battle Cruiser K.M.S. Scharnhorst 1943

skyhigh- Best in Show

- Posts : 4654
Join date : 2009-07-30
Age : 63
Location : Qormi, Malta
Genius.........Bravu Paul ... 

Guest- Guest
Tools have their needs too. Hope that all is up and running soon!!
Paul Salomone- Gold

- Posts : 655
Join date : 2011-07-08
Age : 59
Location : MANIKATA MALTA
Thanks for the encouragement brothers,
Yesterday I purchased the 7 core control cable I needed, and started with the reconnecting of the wiring. Hopefully, this evening, I will replace the drive belts as well, and restart the lathe.


FINGERS CROSSED - HOPEFULLY, NO PROBLEMS.
Yesterday I purchased the 7 core control cable I needed, and started with the reconnecting of the wiring. Hopefully, this evening, I will replace the drive belts as well, and restart the lathe.
FINGERS CROSSED - HOPEFULLY, NO PROBLEMS.
Ray- Best in Show

- Posts : 6102
Join date : 2009-07-21
Age : 61
Location : Zurrieq MALTA
Good one Paul, with each passing day & with every project You embark on, You PROVE again & again that SSM Blood has been running thru your veins from & to Eternity 


Paul Salomone- Gold

- Posts : 655
Join date : 2011-07-08
Age : 59
Location : MANIKATA MALTA
Good morning Brothers, 
Operation "Lathe" is over and done with. I restarted the lathe yesteday, at 11.00pm, to the discomfort of my wife, as she was asleep, and incurred a very rude awaking.
  Anyway, the only thing pending is now to shift the lathe in it's final position,
  insert the high density rubber mat under the pillars of the lathe stand, level and aline it, install & tighten the four holding down bolts - and back to business.


You see, I told you that by Saturday - Palumbo docks will be at work, while Reinmetal will be producing more gun barrels.


Will definetly post more pics of the progress on the Scharnhorst next Monday.


See you this evening brothers.
Get the chicken fillet andchips ready, for today I am hungry.


Operation "Lathe" is over and done with. I restarted the lathe yesteday, at 11.00pm, to the discomfort of my wife, as she was asleep,
 and incurred a very rude awaking.
  Anyway, the only thing pending is now to shift the lathe in it's final position,
 You see, I told you that by Saturday - Palumbo docks will be at work, while Reinmetal will be producing more gun barrels.
Will definetly post more pics of the progress on the Scharnhorst next Monday.
See you this evening brothers.
Get the chicken fillet andchips ready, for today I am hungry.


Haratio Fales- Bronze

- Posts : 216
Join date : 2012-01-22
Age : 61
Location : Cheyenne Wyoming
- Post n°281
 Nice Monster
nice lathe Paul, I bought one on Ebay a bit smaller, and it is probably going to be a chore tooling it to do the small barrols if it even is posible, if nothing else I can teach My seven year old Daughter how to m ake Doll house table legs LOL. I spent 100 dollars, which I think is about 70 euros.
 ake Doll house table legs LOL. I spent 100 dollars, which I think is about 70 euros.
Haratio Fales- Bronze

- Posts : 216
Join date : 2012-01-22
Age : 61
Location : Cheyenne Wyoming
- Post n°282
 New Lathe
This is a picture from one i need to save another hundred and probably buy, its from China but it would be great for a hobbyist and can be configured into a milling , and spiral Jig saw set up and mini drill press. It say s 6 in 1 tool, but one is metal lathe and one is wood.
 s 6 in 1 tool, but one is metal lathe and one is wood.
Paul Salomone- Gold

- Posts : 655
Join date : 2011-07-08
Age : 59
Location : MANIKATA MALTA
Hello Horatio, 
The small balck lathe with the red side covers is produced by an Italian Firm, and the product name is UNIMAT. If you are going to go for one of these things, please make sure that the chuck is metal and not plastic. I have in the past purchased one, which at that time have cost me some LM150.00 (Maltese Liri) equivalent to Euro 350.00; and since most of the items were made from plastic, the whole thing vibrated, when it comes turning brass or any other metals.So please be careful.
You will be better off if you could purchase a dedicated metal turning lathe.

Haratio Fales- Bronze

- Posts : 216
Join date : 2012-01-22
Age : 61
Location : Cheyenne Wyoming
- Post n°284
 Wow
Wow
I was afraid from the looks of that ane the Price that it would probably not be a worth while investment unless youre turning plastic LOL, I think Im going to just save money till I can catch a decent used one on Ebay missing a Motor as I have a mice motr from a broken band saw. And paying 1000 dollars for somthing that works is more valuable than paying 300 for somthing that doesn't.
I have been fixing My brothers car, and Builcing more on the work shop, Clouds keep geting in the way. but I layed out the bow shape so I hope to get an hour to sneak that in on the Cruiser.
I have been fixing My brothers car, and Builcing more on the work shop, Clouds keep geting in the way. but I layed out the bow shape so I hope to get an hour to sneak that in on the Cruiser.
Iain- Commended

- Posts : 88
Join date : 2012-04-21
Age : 58
Location : Cotswolds, UK
I too thought those small Unimat lathe/mill sets looked great and bought one at the Model Engineer Exhibition in London about 15 years ago.
Great concept but I'll second Paul's comments about vibration and use for turning metal. Also found it fairly imprecise to use and gave up on it very quickly.
Sold it on Ebay and got a second-hand 'proper' lathe instead.
Paul - this is a stunning project - only just spotted - but will be following progress. You make it all look so easy - which I know it certainly isn't!!
Iain

Paul Salomone- Gold

- Posts : 655
Join date : 2011-07-08
Age : 59
Location : MANIKATA MALTA
Hello Lain, 
Thanks for your kind interest and encouraging comments. Unfortunately yes, sometimes you only experience the bitter truth


 after spending a good amount of money on what you have tought, was a good investment,
 but turns out to be a failure. Adding insult to injury,
 I even purchased a whole lot of additional extras - also costing another some Euro 400.00, only to end up locked away in the cupboard.
 Anyway, now, at least the lathe that I have is more than enough for my needs and can only say that it is a magnificant piece of equipment; and needy for all scale modellers like us.
With regards to the Scharnhorst, I can only say that when there is a will, there is a way. I am posting as much pics as possible to help out others, who are in need of information and aid. After all we are all scale modellers, and the more we help out - the better.

I viewed you work as well, and can only say that you have some very nest construction and finishing. Marco may be a bit of a pain in the behind - but when it comes to aircraft, he is a walking encyclopedia.
  As a matter of fact we sometimes call him Marcopedia. he knows the subject very well, and when he is in doubt, he researches the subject, until he can give you a concrete advise.
  KEEP IT UP MARCO.
Thanks for your kind interest and encouraging comments.

With regards to the Scharnhorst, I can only say that when there is a will, there is a way. I am posting as much pics as possible to help out others, who are in need of information and aid. After all we are all scale modellers, and the more we help out - the better.
I viewed you work as well, and can only say that you have some very nest construction and finishing.
 As a matter of fact we sometimes call him Marcopedia. he knows the subject very well, and when he is in doubt, he researches the subject, until he can give you a concrete advise.
Paul Salomone- Gold

- Posts : 655
Join date : 2011-07-08
Age : 59
Location : MANIKATA MALTA
Good morning brothers, 
Finally the saga is over and done with. during thesepast four days, I moved the lathe inwards towards the wall by some 300mm, placed high density rubber underneath it and bolted it down. below are some pics.
Moving in position in progress.

The front 12mm diameter rag bolt in place.
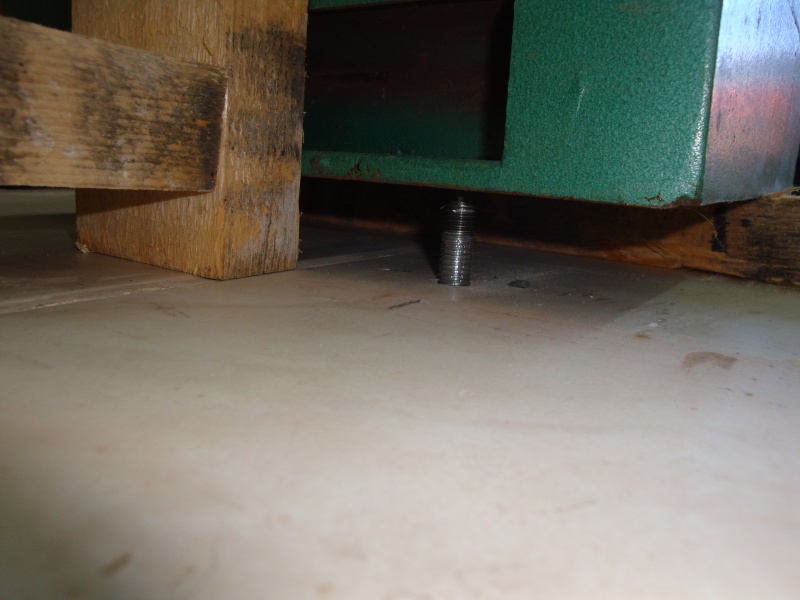
The rear 12mm diameter rag bolt in place.

The 10mm diameter ragbolts on the tailstock side in place.

The high desity rubber mats to go underneath the lathe, cut to size, and await siting in place.

Jacking up the lathe, to remove the wooden insert which was placed before, during siting in place; and lowering bit by bit, in place.
Note the rust marks, indicating the previous position of the lathe

A norman lamp fitted over the headstock, overlooking the chuch.

The position of the new power supply points for the lathe, and anything else that need power.

The power supply points in progress, and the brackets for a small shelf.

The power supply points ready for use, and the shelf,already housing lathe accessories.

The lighting effect with the neon tube lit and the normal light buld, which eliminates the stoboscopic effect of the neon.

Now my friends, I can get back to what I have started - The Scharnhorst, and no more distractions.


Finally the saga is over and done with. during thesepast four days, I moved the lathe inwards towards the wall by some 300mm, placed high density rubber underneath it and bolted it down. below are some pics.
Moving in position in progress.

The front 12mm diameter rag bolt in place.

The rear 12mm diameter rag bolt in place.

The 10mm diameter ragbolts on the tailstock side in place.

The high desity rubber mats to go underneath the lathe, cut to size, and await siting in place.

Jacking up the lathe, to remove the wooden insert which was placed before, during siting in place; and lowering bit by bit, in place.
Note the rust marks, indicating the previous position of the lathe

A norman lamp fitted over the headstock, overlooking the chuch.

The position of the new power supply points for the lathe, and anything else that need power.

The power supply points in progress, and the brackets for a small shelf.

The power supply points ready for use, and the shelf,already housing lathe accessories.

The lighting effect with the neon tube lit and the normal light buld, which eliminates the stoboscopic effect of the neon.

Now my friends, I can get back to what I have started - The Scharnhorst, and no more distractions.

Paul Salomone- Gold

- Posts : 655
Join date : 2011-07-08
Age : 59
Location : MANIKATA MALTA
Good morning brothers, 
Right guys, it's back to scale modelling again, and no joke about it.
Got more pics for you today, basically more progress on the range finder.
The short T-mast, to be located at the center of the range finder dome. The mast itself is just a 1mm diameter brass rod, while the T-spread is made from 0.3mm diameter hardened steel piano wire. I used this method, so that the T-piece will not bend and give way under the tension of the rigging. I joined the two pieces by soldering, and I can say that the joint is very sound.

Photografic evidence of the existance of the short T-mast.

An armour plate located by the side of the range finder.

Photografic evidence, showing the top piece of the armour plating.

The brass photoeched ladder, purchased from the "Modeldockyard in UK".

The t-mast in place.

Thw whole assembly applied with a neat coat of primer.

Additional detailing, consisting of the round headed bolts.

The range finder assembly placed on it's base.

A 1:72nd scale figure kriegsmarine figure, placed adjacent to the range finder assembly.

The additional armour plating togather with the access ladder, finished with a neat coat of primer.

Still a long way to go, as I still have to produce the below listed to finalise the range finder.
A second armour plating strip on the other side.
The second set of lens for the two lens carriers located at the inner sided of the range finder.
Additional detailing found on the range finder.
Water sprinkler assemblies, located on each lens carrier.
Will post more pics further on this week.


Right guys, it's back to scale modelling again, and no joke about it.
Got more pics for you today,
The short T-mast, to be located at the center of the range finder dome. The mast itself is just a 1mm diameter brass rod, while the T-spread is made from 0.3mm diameter hardened steel piano wire. I used this method, so that the T-piece will not bend and give way under the tension of the rigging. I joined the two pieces by soldering, and I can say that the joint is very sound.

Photografic evidence of the existance of the short T-mast.

An armour plate located by the side of the range finder.

Photografic evidence, showing the top piece of the armour plating.

The brass photoeched ladder, purchased from the "Modeldockyard in UK".

The t-mast in place.

Thw whole assembly applied with a neat coat of primer.

Additional detailing, consisting of the round headed bolts.

The range finder assembly placed on it's base.

A 1:72nd scale figure kriegsmarine figure, placed adjacent to the range finder assembly.

The additional armour plating togather with the access ladder, finished with a neat coat of primer.

Still a long way to go, as I still have to produce the below listed to finalise the range finder.
A second armour plating strip on the other side.
The second set of lens for the two lens carriers located at the inner sided of the range finder.
Additional detailing found on the range finder.
Water sprinkler assemblies, located on each lens carrier.
Will post more pics further on this week.

Ray- Best in Show

- Posts : 6102
Join date : 2009-07-21
Age : 61
Location : Zurrieq MALTA
There he is with "legs in full stretch" again 

bcauchi- Best in Show

- Posts : 4088
Join date : 2009-07-30
Age : 63
Location : St. Julian's
Prosit Paul, i love the small details, they really start making the whole thing look complete.

Paul Salomone- Gold

- Posts : 655
Join date : 2011-07-08
Age : 59
Location : MANIKATA MALTA
Thanks guys, 
I am trying to get the best out of it. Of course, it's not always easy, but I must say that till now, things are getting along well. At the moment I am working on the second armour plate, which is to be fitted on the other side. I should be able to post more pics by Thursday of Friday the most.
I shall bring along the range finder tomorrow evening.
See you all
in nannu pec- Best in Show

- Posts : 2019
Join date : 2009-07-23
Age : 76
Location : Qawra Malta
I echo il |Cocru...nice Paul....prosit
In nannu
In nannu

Paul Salomone- Gold

- Posts : 655
Join date : 2011-07-08
Age : 59
Location : MANIKATA MALTA
Good morning Brothers, 
More progress pictures of the range finder. Almost complete now.
The 1mm diameter rivet heads to be used on the second armour plating strip.
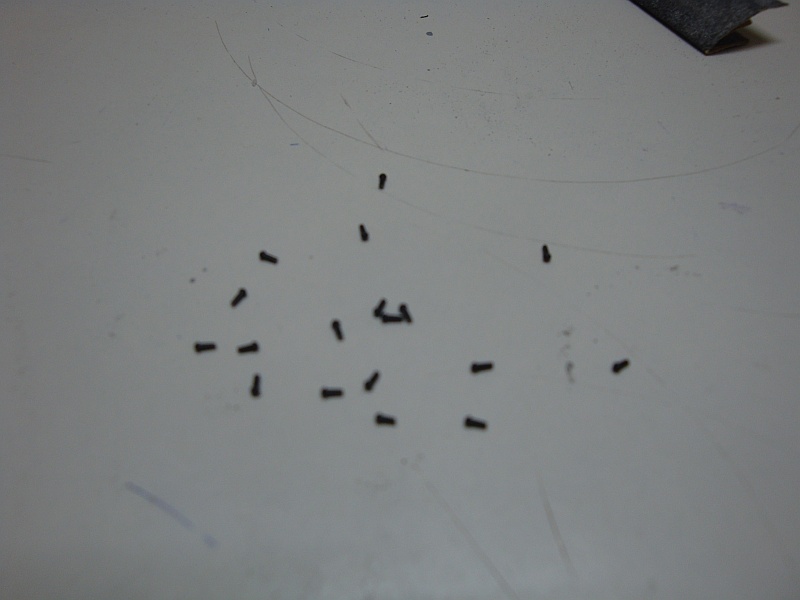
The second armour plateing strip, on which the rivet heads will be placed.

The rivets in place.

preparing for the last tedious job - the rivet heads for the range finder armour sleeve locking flange.

The 0.8mm diameter rivets heads to be used.

The first quarter ready.

The full set is in place.

The photo etched access ladder in place.

The whole assembly, applied with a coat of primer.

The de-icing water sprinkler in place.

A front view of the water sprinkler.

A front view showing both sprinklers.

A top view of the whole assembly.

The first range finder is almost ready now. But to be able to produce the small triple lens carrier located on the inner sides of the range finder, I have to buy a small collet chuck to enable me to use the milling machine, in order to drill the three lens holes, on each lens carrier.
But don't worry brothers, the last pieces shall be over and done with by next weekend, and continue with the progress on the armoured bridge.
Will try to post more pics during the week.
Will bring the range finder this Wednesday to the club.
More progress pictures of the range finder. Almost complete now.
The 1mm diameter rivet heads to be used on the second armour plating strip.

The second armour plateing strip, on which the rivet heads will be placed.

The rivets in place.

preparing for the last tedious job - the rivet heads for the range finder armour sleeve locking flange.

The 0.8mm diameter rivets heads to be used.

The first quarter ready.

The full set is in place.

The photo etched access ladder in place.

The whole assembly, applied with a coat of primer.

The de-icing water sprinkler in place.

A front view of the water sprinkler.

A front view showing both sprinklers.

A top view of the whole assembly.

The first range finder is almost ready now. But to be able to produce the small triple lens carrier located on the inner sides of the range finder, I have to buy a small collet chuck to enable me to use the milling machine, in order to drill the three lens holes, on each lens carrier.
But don't worry brothers, the last pieces shall be over and done with by next weekend, and continue with the progress on the armoured bridge.
Will try to post more pics during the week.
Will bring the range finder this Wednesday to the club.

skyhigh- Best in Show

- Posts : 4654
Join date : 2009-07-30
Age : 63
Location : Qormi, Malta
Brillant work Paul ,very fine detail...welldone... 

Paul Salomone- Gold

- Posts : 655
Join date : 2011-07-08
Age : 59
Location : MANIKATA MALTA
Thanks Marco,
This weekend I shall be working on the six in number perescopes that were located at the front of the armoured bridge. They should be ready by Monday.
See you tomorrow habib.


This weekend I shall be working on the six in number perescopes that were located at the front of the armoured bridge. They should be ready by Monday.
See you tomorrow habib.

Dottore- Gold

- Posts : 1388
Join date : 2009-07-21
Age : 46
Location : Tarxien, Malta
- Post n°296
 Lovely work....
I see your pain fitting all those rivets...but they turend out a treat! Prosit!
Dottore
Dottore

Paul Salomone- Gold

- Posts : 655
Join date : 2011-07-08
Age : 59
Location : MANIKATA MALTA
Thanks Dottore, 
Yes I can say that the placing of the rivet heads caused a bit of a headache, but the end result was worth it. Shall do more progress during the weekend.
Yes I can say that the placing of the rivet heads caused a bit of a headache, but the end result was worth it. Shall do more progress during the weekend.
David- Silver

- Posts : 421
Join date : 2009-07-22
Age : 62
Paul
A comment on your signature
Never Retreat Never Surrender
Ironically
If Von Paulus had retreated he would never have surrendered
It is madness to attempt to hold. In the first place the troops cannot do it and in the second place if they do not retreat they will be destroyed. I repeat that this order be rescinded or that you find someone else.
Gerd von Rundstedt
D

Paul Salomone- Gold

- Posts : 655
Join date : 2011-07-08
Age : 59
Location : MANIKATA MALTA
Good afternoon David, 
If I have surrendered, I would not have built my house.
If I have surrendered, I would not have bought wood working machines and produced my house furniture.
If I have surrendered, i would not have spent 25 years of my life in the building services industry, which for the past 20 years, has been decending into madness.
If I have surrendered, I would not have started off with the Scharnhorst project.
So you see my friend, that signiture means more to me, than you could ever imagine.
Those words are more valuable to me, than the 10 commandments.
If I have surrendered, I would not have built my house.
If I have surrendered, I would not have bought wood working machines and produced my house furniture.
If I have surrendered, i would not have spent 25 years of my life in the building services industry, which for the past 20 years, has been decending into madness.

If I have surrendered, I would not have started off with the Scharnhorst project.
So you see my friend, that signiture means more to me, than you could ever imagine.
Those words are more valuable to me, than the 10 commandments.

in nannu pec- Best in Show

- Posts : 2019
Join date : 2009-07-23
Age : 76
Location : Qawra Malta
wisely spoken Paul..... 
 ....amen I could add a few things to what you posted
In nannu
ps prosit tax xoghol habib !
In nannu
ps prosit tax xoghol habib !


