Awesome All The Way
+28
Rob Wood
Samwel18
el manolo
5Nige
Robert
jojjemannen
tiking
Noel Petroni
olivermifsud
Iain
alexbb
smallia
Proximo41
Haratio Fales
RayCaruana
Cyril.
Wayne
Tancred
Dottore
ascomt
skyhigh
in nannu pec
Aldo
iCocker
Ray
David
bcauchi
Paul Salomone
32 posters
1:72 Scale German WW2 Heavy Battle Cruiser K.M.S. Scharnhorst 1943
Ray- Best in Show
- Posts : 6102
Join date : 2009-07-21
Age : 61
Location : Zurrieq MALTA
Keep at it at will Paul
Awesome All The Way
Awesome All The Way
skyhigh- Best in Show
- Posts : 4654
Join date : 2009-07-30
Age : 63
Location : Qormi, Malta
RayCaruana wrote:Paul Salomone wrote:Thanks Ivan,
Such comments are encouraging - and yes I would like to create a cottage industry creating these things. The only problem is the time and if I have to go even for a minimum production, I will have to upgrade my workshop to include CNC technology, which is bloody expensive.
But yes - it's worth giving the idea a true thought.
Heqq and you will have to build a cottage too or a girna at least
Le ta Ray ir reg... dan l avatar ma nistax nidrah ...ahjar li kellek qabel...kien isbah..
skyhigh- Best in Show
- Posts : 4654
Join date : 2009-07-30
Age : 63
Location : Qormi, Malta
prosit Paul beautifull work indeed , but the german type are more detailed ,... insomma german type uh....
Paul Salomone- Gold
- Posts : 655
Join date : 2011-07-08
Age : 59
Location : MANIKATA MALTA
Thanks guys,
Trying to do my best.
Haratio Fales- Bronze
- Posts : 216
Join date : 2012-01-22
Age : 61
Location : Cheyenne Wyoming
- Post n°255
hey all
Hello to everyone, I have done more work on the Kruizer, and am trying to post new pics but It wont let me access the host pic site for some reason/ LOL maybee it knows I'm a Yank or something, anyway Im going to a New Job inteview sometime in the next few days, so a few prayers would be appriciated as I really need teh employement to keep on living, and just a little better than surviving. I lookes at a few lathes this weekend but they are to big and to expensive at the moment
Paul Salomone- Gold
- Posts : 655
Join date : 2011-07-08
Age : 59
Location : MANIKATA MALTA
Hello Horatio,
I cannot see why you cannot post the pics. I mean, if you are posting the messages, than you cal also post the pics. Check if you have something wrong with the keypad, as sometimes they tend to give trouble. As for me, I change around two to three keyboards every year - as I do a lot of office work; in which case the keyboard suffer the most when I have my share of work tension.
Anyway - good luck for your interview - I look forward to hearing the good news. And don't worry - there will be a time to buy the lathe as well.
Haratio Fales- Bronze
- Posts : 216
Join date : 2012-01-22
Age : 61
Location : Cheyenne Wyoming
- Post n°257
Hey Paul
I got the Pic thing figured out, I wasnt Pasting right, anyway I put more pics on My bog and am setting up to make a post on The Ship Forum also, Im happy I finally go rolling again, and the Sun has come out again. I saw the Pic from teh show of the Hood. Awsome, lol wish it was 72nd scale but it would look good next to the Bismark from Soar Arts thats in 144 scale. Anyway I dont want to clog your pages so Ill chat more on mine.
Paul Salomone- Gold
- Posts : 655
Join date : 2011-07-08
Age : 59
Location : MANIKATA MALTA
Good morning all,
Some interesting pics of the Scharnhorst.
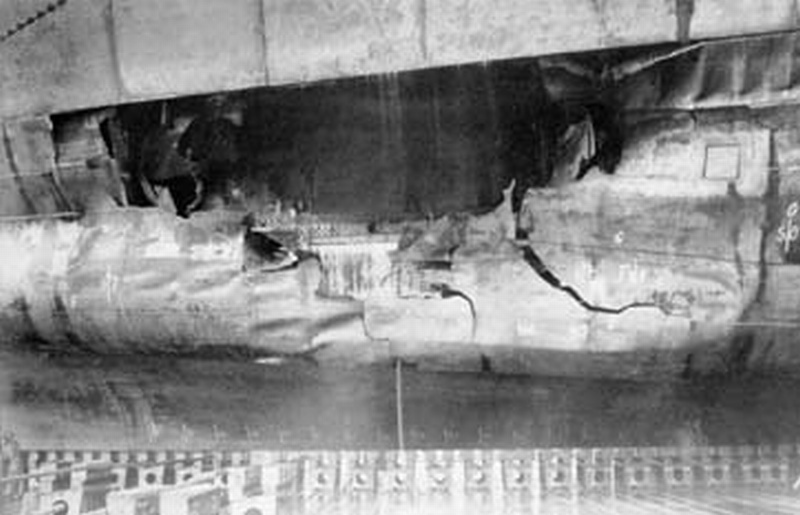
Scharnhorst in drydock at Deutsche Werke shipyard, Kiel. This photo shows the damage made by the serious torpedo hit from the British destroyer HMS Acasta during Operation "Juno".
A closeer look at the damage.
A very rare photo of the Scharnhorst and the Tirpitz togather in Norway. The Scharnhorst (left) together with the Tirpitz (right) shortly before the start of Operation "Sizilien".
Ray- Best in Show
- Posts : 6102
Join date : 2009-07-21
Age : 61
Location : Zurrieq MALTA
Morn Paul, you rose quite early to catch them ships so near each other
Interesting rare pics definitely
Have a good day & see you this eve
Interesting rare pics definitely
Have a good day & see you this eve
Paul Salomone- Gold
- Posts : 655
Join date : 2011-07-08
Age : 59
Location : MANIKATA MALTA
Good morning Ray,
Yes - see you this evening, and shall bring with me the master barrel for Romeo's Hood.
Wayne- Gold
- Posts : 1065
Join date : 2011-01-11
Age : 45
Location : Smack in the middle of the Med
Nice photos Paul, particularly the last one. It is also interesting how the camo on the scharnhorst makes it look smaller than it actually is... sneaky Jerries!
_________________
Bench: Bv 141 B, Ju 87 G-2, Macchi C.205, Arado Ar.234
Stash: Ju87D-3, Bf 109 E-3, Bf109 F-4/trop, Bf 109 G-10, He219....
www.ScaleModelBench.com
Paul Salomone- Gold
- Posts : 655
Join date : 2011-07-08
Age : 59
Location : MANIKATA MALTA
Hi Wayne,
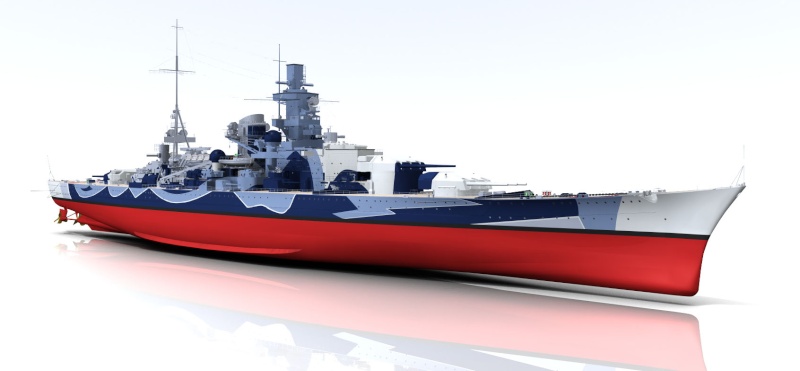
Yes I must admit that this particular photo was quite a find. Even the two camoflage schemes, present a good impression of how the Germans operated in every theatre of the war. The camoshown was appliedduring the first months of 1943, but the last scheme with which it sailed on the last sortie in December 1943; was quite a scene.
Apart from this. only God knows how many hours of labour, tons of patience and collection of swearwords are required, for me to create this scheme shown below.
in nannu pec- Best in Show
- Posts : 2019
Join date : 2009-07-23
Age : 76
Location : Qawra Malta
This is it Paul !....hekk trid taghmila !....beautiful !.....the end result will bear the fruit iof your labour....loads of masking....*&^%$%^&^%.....and a labour of love....ejja ha narawha lesta !
IN nannu
IN nannu
Paul Salomone- Gold
- Posts : 655
Join date : 2011-07-08
Age : 59
Location : MANIKATA MALTA
Good morning Nannu,
Thanks for the encouragement. Sometimes a little push, helps to go along and push forward.
Just one thing about the scheme. The pattern shown in the above pics is correct, but the colours are not. In actual fact, it was a mixture of shades of German Naval Grey tones. What is shown as dark blue - in actual fact should be dark blue grey. I have all the colour codes as used by the German WW2 Kriegsmarine. AJ-Press have published a book some time ago, showing all the camo schemes applied to German vessels. As a matter of fact, I am awaiting for the second volume to be published, but a colour code chart was issued with volume 1, with all the colour codes - so I cannot go wrong on that.
Will be posting more pics next Monday, after a good weekend of scale modelling progress on the Scharnhorst.
in nannu pec- Best in Show
- Posts : 2019
Join date : 2009-07-23
Age : 76
Location : Qawra Malta
Paul have a look at this site
http://www.bismarck-class.dk/
might be interesting for u...
#In nannu
http://www.bismarck-class.dk/
might be interesting for u...
#In nannu
Proximo41- Bronze
- Posts : 287
Join date : 2009-09-03
Age : 56
in nannu pec wrote:Paul have a look at this site
http://www.bismarck-class.dk/
might be interesting for u...
#In nannu
Nann.... thaseb li Paul ma jafx b dik il website?!!! possibbli?!!!
Paul Salomone- Gold
- Posts : 655
Join date : 2011-07-08
Age : 59
Location : MANIKATA MALTA
Prosit Chris,
Of course I know the site, and there are also some of the your modelas as well Nannu Pec, Eh Eh Eh Eh Eh Eh.
Haratio Fales- Bronze
- Posts : 216
Join date : 2012-01-22
Age : 61
Location : Cheyenne Wyoming
- Post n°268
German Ship Camo
The reason the ships were painted to look smaller was to make it hard for optical range finders to determine accurate ranges for cauculating effecive fire solutions, it wasnt really to make them look smaller but farther away. interestingly the geman crew painted the bismark grey over the camo a few days before it encountered the Hood and Prince of Wales.
Paul Salomone- Gold
- Posts : 655
Join date : 2011-07-08
Age : 59
Location : MANIKATA MALTA
Good morning brothers,
Some progress on the rangefinder, located on the armoured bridge.
As some of you may know, most navies, especially the German Navy in WW2, used round headed bolts; especially in exposed surfaces. Normal bolts were of course used as well, but as I said, the locking bolts used on the main exposed surfaces, were of the round headed type and had a triangular insert. The insert was in fact the means with which the bolts was finally tightened - just like we nowadays know as allen type screws and bolts. But instead of having a hexagonal insert, the German prefered a triangular insert.
The set of round headed bolts to be used is in fact the rivet set as produced by CMK - the size is of 0.8mm.
One can apprecieate the small size of the heads to be used.
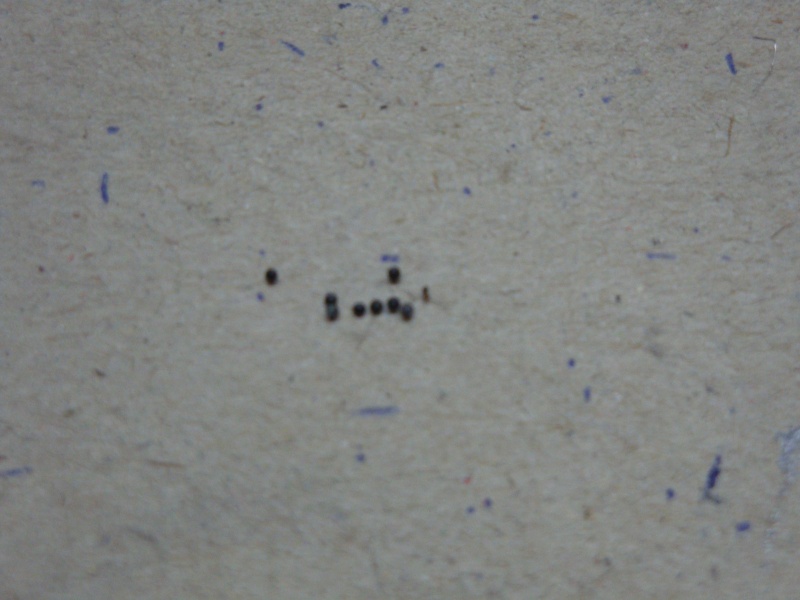
Fixing the bolt heads in place by using a slight drop of PVA glue. This gives you ample time to place the bolt head in place - where as the super glue can give you a very hard time.
The bolt heads in place, including the bolt heads which locked the armoured ventilator cap in place.
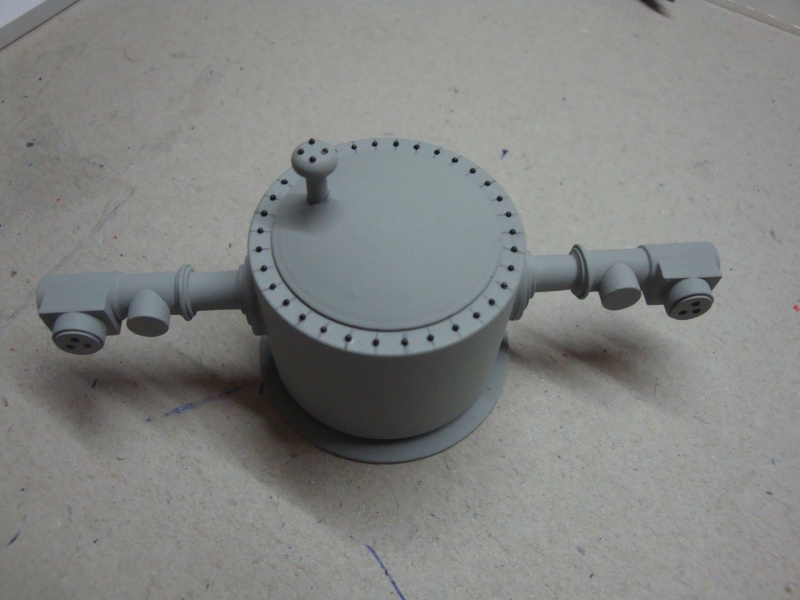
The base of the range finder, was also locked in place by means of bolts, but this time the bolts are of the normal type, as the base is nearly covered by the range finder itself, so this was not considered as an exposed area.
The range finder, ready to recieve it's share of primer paint - to becarried out this weekend.
A close up of the base.
This weekend I will try to finish it off, fix in place the photoetched ladder (supplied by scale link models) and the access panels. the lastpiece to be fitted is the short tee headed mast, which supported the two steel wire rigging, hanging from the top platform of the tower to the tee section of the short mast.
Post more pics next Monday.
iCocker- Best in Show
- Posts : 3172
Join date : 2009-07-21
Age : 50
Location : Marsascala, Malta
Nice ...
Ray- Best in Show
- Posts : 6102
Join date : 2009-07-21
Age : 61
Location : Zurrieq MALTA
Kuwl
Haratio Fales- Bronze
- Posts : 216
Join date : 2012-01-22
Age : 61
Location : Cheyenne Wyoming
- Post n°272
Awsome detail
Awsome detail Paul. ever think about resin casting after you make a part like that, as some of the other ships you will be working on will have the same or similar parts. plus I would buy stuff like that to save me from having to make it LOL. I am buying batteries for my camera tonight, I have allot more done on the front section of the cruiser hull, I am starting the layout of the aft and mid, torpedo deck in the center so I am a little excited. I think I have done more in the last two weeks than I have in three months and its starting to show so I am letting that motivate me to not be so side traked and keep on building. any way Your work is never short of being simply amazing.
Paul Salomone- Gold
- Posts : 655
Join date : 2011-07-08
Age : 59
Location : MANIKATA MALTA
Good morning Brothers,
Thanks for your encouraging comments. I will post more pics of the progress next Monday. Hi Horatio,good to know that you have carried out more work on the cruiser. With regards to castings, I prefer not to. You see, Horatio, the real fun is in building the thing itself. If you start buying ready made things. it would be just like buying a normal scale model kit. Dont't worry, I you need some special pieces that you cannot possibly produce, just tell me what you need and I will do them for you.
Come on mate, thumbs up and get the cruiser ready for sailing.
bcauchi- Best in Show
- Posts : 4088
Join date : 2009-07-30
Age : 63
Location : St. Julian's
Kemm int kbir Pawl! that is some really awesome work, by the way what interesting photos are emerging in this thread,truly great!
Paul Salomone- Gold
- Posts : 655
Join date : 2011-07-08
Age : 59
Location : MANIKATA MALTA
Good morning Brothers,
I'am afriad that I did not do much modelling during the weekend. The drinving belt of the lathe tore off, so I had to dismantle at least half of the lathe to be able to change it. During this unwanted tour of duty, I then carried out a major job that was stored in my mind these last three years. That is, a new light fitting installed just above the lathe, and to dismantle completely the electrical power/control panel, which was originaly factroy fitted to the rear side of the lathe, and mount it on the wall. This way I can easily access the panel for maintenance and repairs. It was a lengthy job - but bit by bit, I managed to dismantle all the wiring and fixed the panel to the wall.
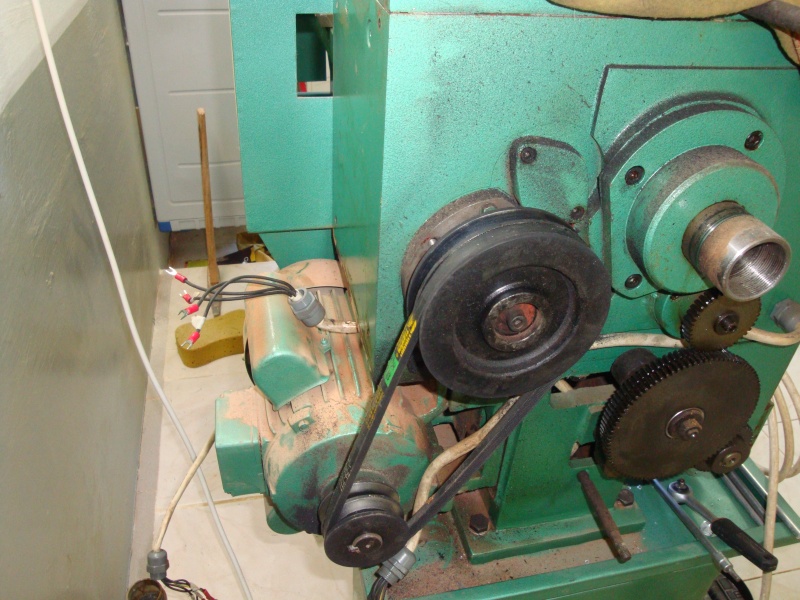
The dismantling in progress - all wires disconnected and panel loose.
The new neon light fitting installed on the lathe. A normal light fitting will also be installed to eliminate any stroboscopic effects produced by the noen light.
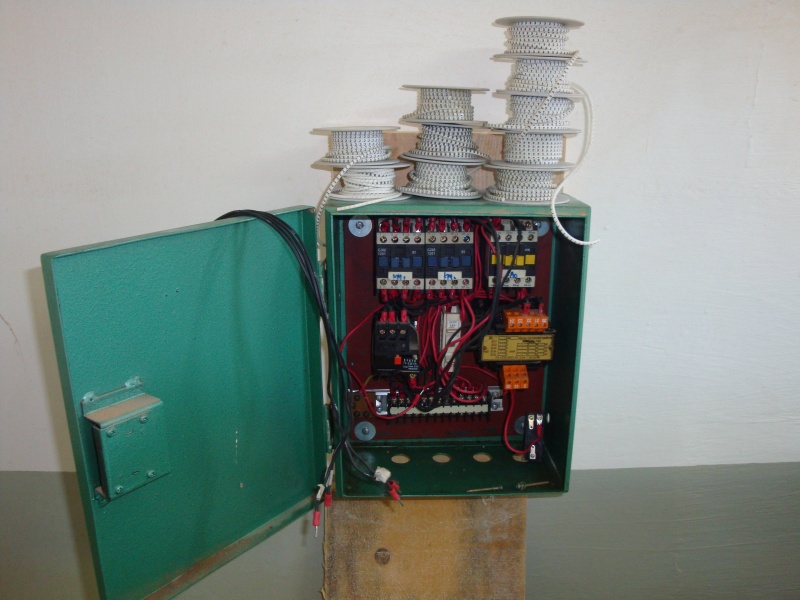
The power/control panel on the floor - waiting to be mounted on a wooden board.
The board in Place, fixed to the wall, and wiring process to begin.
Don't worry brothers - I will get the lathe to function by tomorrow, and next weekend i will be producing more gun barrels.
I'am afriad that I did not do much modelling during the weekend. The drinving belt of the lathe tore off, so I had to dismantle at least half of the lathe to be able to change it. During this unwanted tour of duty, I then carried out a major job that was stored in my mind these last three years. That is, a new light fitting installed just above the lathe, and to dismantle completely the electrical power/control panel, which was originaly factroy fitted to the rear side of the lathe, and mount it on the wall. This way I can easily access the panel for maintenance and repairs. It was a lengthy job - but bit by bit, I managed to dismantle all the wiring and fixed the panel to the wall.
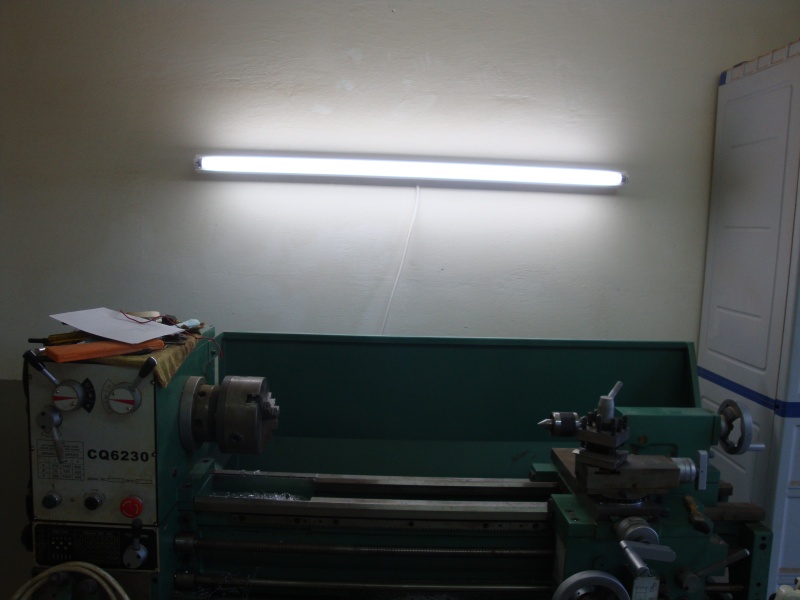
The dismantling in progress - all wires disconnected and panel loose.
The new neon light fitting installed on the lathe. A normal light fitting will also be installed to eliminate any stroboscopic effects produced by the noen light.
The power/control panel on the floor - waiting to be mounted on a wooden board.
The board in Place, fixed to the wall, and wiring process to begin.
Don't worry brothers - I will get the lathe to function by tomorrow, and next weekend i will be producing more gun barrels.