I'm really impressed with the level of detail of these Airfix kits!!!
Look at all those lines!!!


Wheels are also weighted!!!!

Last edited by Noel Petroni on Sun Jan 12, 2014 3:11 pm; edited 6 times in total

 Albatross 1/72 Declared Complete!


YesNoel Petroni wrote:I'm soon starting the paint for the cockpit..... can anyone tell me the approx colour for the interior from the Vallejo range, please.
- Was all the cockpit in one colour including the seat?


Noel Petroni wrote:I'm soon starting the paint for the cockpit..... can anyone tell me the approx colour for the interior from the Vallejo range, please.
- Was all the cockpit in one colour including the seat?


 Re: Albatross 1/72 Declared Complete!
 You see Noel......I was CORRECTbcauchi wrote:Interior green yes Noel, you can follow the picture you found, a bit of lightness or darkness here and there will not make that much of a difference especially if you give it a wash. Also if you plan to have the canopy closed as you did with the 109, nothing is going to show so don;t bother much.

 Re: Albatross 1/72 Declared Complete!


 Re: Albatross 1/72 Declared Complete!
 Re: Albatross 1/72 Declared Complete!


 Re: Albatross 1/72 Declared Complete!
 LOL!!! I saw that he had teeth and thought he was a snake!!skyhigh wrote:He heheh ......Noel that is not a snake ,,but a worm.. for the Sqd......
http://www.asisbiz.com/Luftwaffe/jg3.html

 Re: Albatross 1/72 Declared Complete!
 Re: Albatross 1/72 Declared Complete!

 Re: Albatross 1/72 Declared Complete!
 Re: Albatross 1/72 Declared Complete!
 bcauchi wrote:Nice work Noel. Neat and fast. keep the pics coming.


 Re: Albatross 1/72 Declared Complete!
 Re: Albatross 1/72 Declared Complete!

 Re: Albatross 1/72 Declared Complete!
 Re: Albatross 1/72 Declared Complete!
 Re: Albatross 1/72 Declared Complete!
 bcauchi wrote:Hi Noel, for a scribing tool, you can either buy one or improvise as Ray just pointed out. you can also use a sharpened nail or something else to simply scratch the plastic with. For the decals, as Marco said, you need a decal setting solution. i bought one from model shop by testors and it is ok. i find it ok.


 Re: Albatross 1/72 Declared Complete!
 Re: Albatross 1/72 Declared Complete!
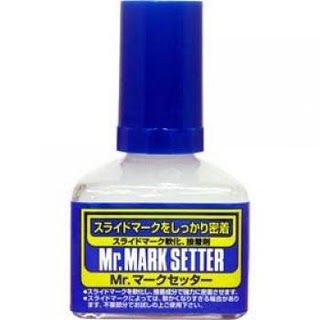
 Joseph wrote:As a decal solution I use the 'Mr Mark Setter' and 'Mr Mark Softer'. For me the best combination for applying decals.
The most important thing is that surface is GLOSS, mirror like and flat, so as to avoid silvering.
J